
What is Traccar?
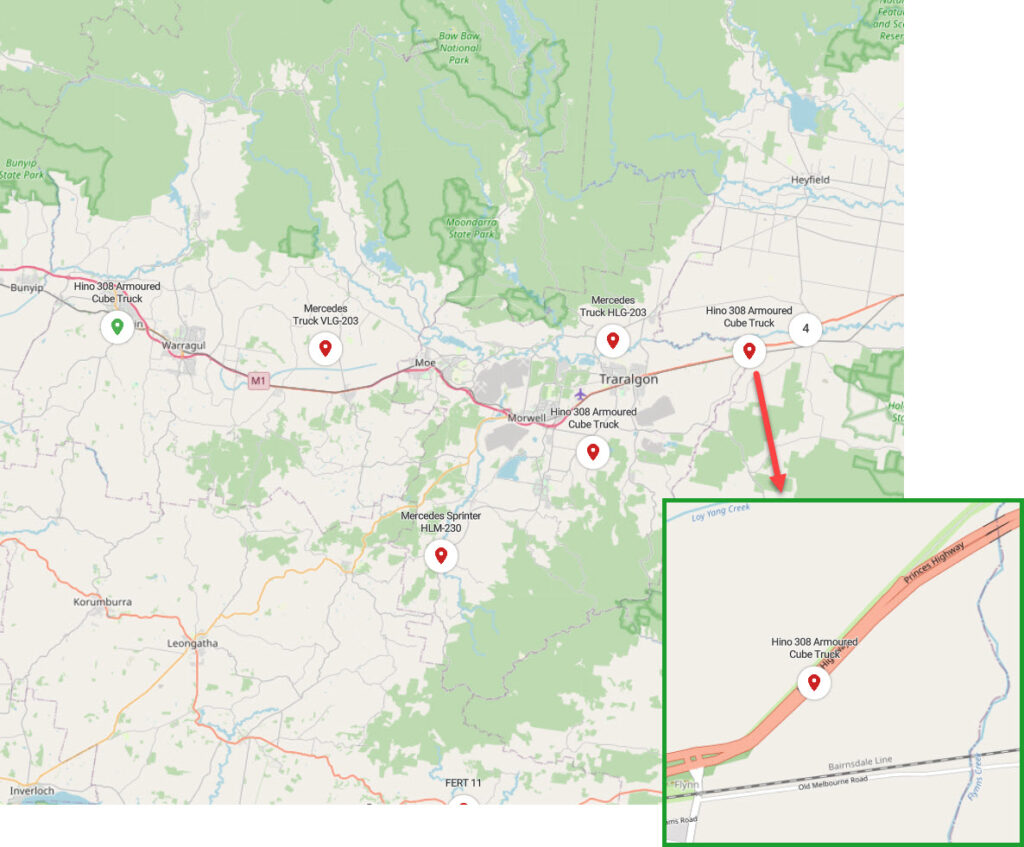
Traccar is an open source GPS Tracking platform which can locate any number and type of devices.
You can track vehicles, boats, trucks, kids, adults, pets via iPhones, Android devices, dedicated hardware and more.
Purpose of this guide
Use this guide to install Traccar onto a Ubuntu 20.04 server. I use Racknerds Virtual Private Servers to host my Ubuntu Traccar demo server.
Click the link below to check the end result of this guide.
Feel free to register an account on our demo server, log in and check it out. There’s a limit of one device on this server.
Link: https://portal.gpsbeam.com/
This guide will show you how to set up the Traccar Manager server, which receives the GPS location updates from the devices (iPhone, android, dedicated, etc) and displays them on an interactive map.
In the next tutorial, using the Traccar Client app, you will be shown how to point an Android & iPhone to the server as a demonstration of how it works.
Other gps tracking devices may have slightly more complex systems to configure the tracking server but that won’t be covered in this guide.
How it works
GPS Device > Receives Signal from GPS Satellite & stores location data > Sends location data over LTE/4G/5G/Satellite to GPS Tracking Server > User logs into Tracking Server web interface > Views GPS device on the map.
The GPS Tracking server has a portal that you can log into to see the data displayed on the interactive map.
Log into your server
SSH into your server to begin configuring it.
We recommend that you look into ‘hardening’ your server, to prevent unauthorized users access.
Once logged in, elevate to the root account
sudo suUpdate all packages
apt updateConfigure MySQL
Install MySQL Database Server
apt install mysql-server -yStart the MySQL service
systemctl start mysql.serviceLogin to MySQL
sudo mysqlSet yourself a strong MySQL Root password. Save it in your password manager
ALTER USER 'root'@'localhost' IDENTIFIED BY 'MyN3wP4ssw0rd';  #Set the root password
flush privileges; #force changes to come into effect
exit;
#exit mysql
Prepare the database connection & credentials using export to set variables which we will reuse a few times.
In line two of the below code we have used openssl to generate a secure password and store it within the variable $securePassword. This way the password is never exposed to the command line history.
Note: The password saved in the variable $dbTraccarAdminPassword below will exist whilst your terminal session is active.
Be sure to complete all steps below. Don’t stop halfway through these steps, and come back as the variable will cease to exist.
export dbTraccarAdmin="traccar_admin"
export dbTraccarAdminPassword="$(openssl rand -base64 12)"
export dbTraccarName="traccar_database"
export dbTraccarHost="localhost"
export dbTraccarHostPort="3306"
Secure the database.
mysql -e "DROP USER IF EXISTS''@'localhost'" #Drop anonymous users users #Drop anonymous users users
mysql -e "DROP DATABASE IF EXISTS test" #Remove the demo database
mysql -e "DELETE FROM mysql.user WHERE User='root' AND Host NOT IN ('localhost', '127.0.0.1', '::1')" #Deny root remote login. Restrict to local login only.
mysql -e "FLUSH PRIVILEGES" #Force changes to come into effect
Create the Traccar database & user
Create the database that Traccar will use
mysql -e "create database $dbTraccarName CHARACTER SET utf8mb4 COLLATE utf8mb4_unicode_ci" #Creates the databaseCreate the Traccar database user.
mysql -e "CREATE USER $dbTraccarAdmin@$dbTraccarHost IDENTIFIED WITH mysql_native_password BY '${dbTraccarAdminPassword}'"Provide the Traccar DB admin user full access to the Traccar database
Using best practices, we will create a database user that has access to only the traccar database.
mysql -e "GRANT ALL ON $dbTraccarName.* TO $dbTraccarAdmin@$dbTraccarHost"Reload privileges to force them into effect.
mysql -e "FLUSH PRIVILEGES"Set up Traccar
Check for the latest version of Traccar
Please note that updates are often released, so version 5.2 may no longer be the latest. In this case, if you wish to install a newer version you can refer to the Traccar downloads page: https://www.traccar.org/download/ & replace the references to 5.2 below with the current version.
Otherwise, continue below by downloading Traccar server 5.2
wget https://github.com/traccar/traccar/releases/download/v5.1/traccar-linux-64-5.1.zip -O /tmp/traccar-linux-64-5.2.zipUnzip the file
If unzip is not installed, install it
apt install unzip -yNow you can unzip.
unzip /tmp/traccar-linux-64-5.2.zip -d /tmp/traccar-linux-64-5.2Install traccar
/tmp/traccar-linux-64-5.2/traccar.runUpdate the traccar configuration file with the MySQL connection.
cat > /opt/traccar/conf/traccar.xml <<EOF
<?xml version='1.0' encoding='UTF-8'?>
<!DOCTYPE properties SYSTEM 'http://java.sun.com/dtd/properties.dtd'>
<properties>
<entry key='config.default'>./conf/default.xml</entry>
<!--
This is the main configuration file. All your configuration parameters should be placed in this file.
Default configuration parameters are located in the "default.xml" file. You should not modify it to avoid issues
with upgrading to a new version. Parameters in the main config file override values in the default file. Do not
remove "config.default" parameter from this file unless you know what you are doing.
For list of available parameters see following page: https://www.traccar.org/configuration-file/
-->
<entry key='database.driver'>com.mysql.cj.jdbc.Driver</entry>
<entry key='database.url'>jdbc:mysql://$dbTraccarHost:$dbTraccarHostPort/$dbTraccarName?serverTimezone=UTC&allowPublicKeyRetrieval=true&useSSL=false&allowMultiQueries=true&autoReconnect=true&useUnicode=yes&characterEncoding=UTF-8&sessionVariables=sql_mode=''</entry>
<entry key='database.user'>$dbTraccarAdmin</entry>
<entry key='database.password'>$dbTraccarAdminPassword</entry>
</properties>
EOFRestart the Traccar service which will bring the MySQL configuration settings into effect.
Traccar will configure your database automatically.
service traccar restartTest from another computer if you can access Traccar on it’s IP & port via a web browser
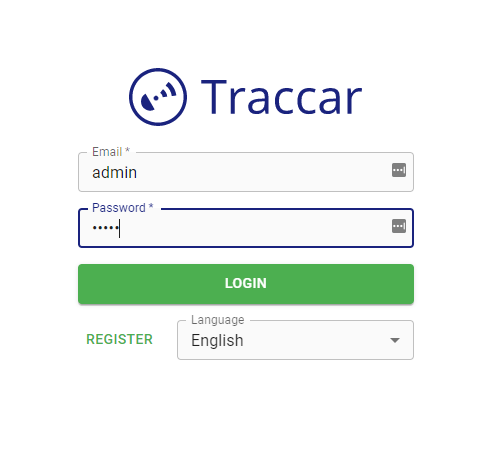
http://your-ip-address-here:8082You should now see the logon screen of Traccar.
The default username/password is
Username: admin
Password: admin
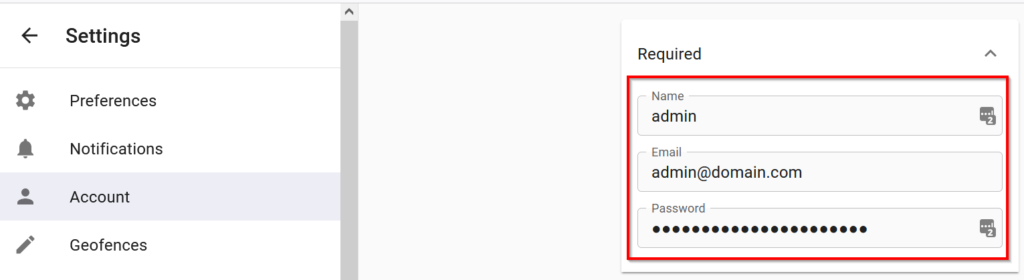
You should immediately enter your email and change the password within Settings.
Congratulations, Traccar is installed and configured. You can now add devices.
If you would like to test the tracking, then download the Traccar Client application for iOS or iPhone and configure the server details to your Traccar Servers IP address and port.
Bonus Material
Alias shortcuts
Make your life easier with these handy aliases. Add the below lines to your .bash_alias file
Edit the .bash_aliases file
vi ~/.bash_aliasesAdd the below content
# editing alias
alias vi_alias='vi ~/.bash_aliases'
alias source_alias='source ~/.bash_aliases'

#traccar
alias traccar_down="sevice traccar stop"
alias traccar_up="service traccar start"
alias traccar_restart="service traccar restart"
alias traccar_logs="tail -f -n 300 /opt/traccar/logs/tracker-server.log"
Now load the .bash_aliases file.
source ~/.bash_aliasesNow from this point, updating and reloading your .bash_aliases file is easy. To add something a new alias, use
vi_aliasAnd to save it, use
source_aliasYou can now use these handy shortcuts for stopping & starting traccar.
traccar_down #Stops the traccar service
traccar_up #Starts the traccar service
traccar_restart #Restarts the traccar service
traccar_logs #View traccar logs